Photography Tips for Capturing Your Kayaking Adventure
There’s something magical about gliding through water in a kayak, with unique perspectives and access to stunning scenery that land-bound travelers miss entirely. But capturing these special moments presents unique challenges – from protecting your gear from water damage to shooting steady images in a moving vessel.
As someone who has spent years photographing kayaking expeditions from Thailand’s limestone caves to Alaska’s glacial fjords, I’ve learned that with the right preparation and techniques, you can bring home breathtaking images that truly capture the essence of your paddling adventures. Here’s my guide to taking your kayak photography to the next level.

Essential Gear: Balancing Protection and Accessibility
The first challenge of kayak photography is keeping your equipment safe while ensuring it’s readily accessible when that perfect shot presents itself. Here’s what you need:
Waterproof Protection
Dry bags are your primary defense against water damage. Invest in quality options with these features:
- Roll-top closures that create a reliable watertight seal
- Clear panels that allow you to see contents
- Quick-access designs specifically made for cameras
Recommended options:
- Sea to Summit Big River Dry Bag (for general gear)
- Watershed Ocoee Drypack (premium protection for camera bodies)
- NRS Ether HydroLock Dry Sack (for smaller accessories)
Hard cases provide superior protection but less accessibility:
- Pelican cases offer excellent protection but can be bulky on smaller kayaks
- Nanuk cases provide a good balance of protection and compact size
- Waterproof camera cases from Aquapac allow operation while sealed
Quick tip: Line your dry bags with absorbent microfiber towels. They protect against condensation and provide emergency cleanup for unexpected splashes.
Camera Selection
The best kayaking camera balances image quality with practical considerations:
Weather-sealed mirrorless cameras offer the ideal combination of quality, size, and durability:
- Sony A7C or Olympus OM-D E-M5 series provide excellent weather resistance
- Fujifilm X-T4 offers weather sealing in a versatile package
Premium compact cameras are excellent alternatives:
- Sony RX100 VII delivers exceptional quality in a pocket-sized package
- Olympus Tough TG-6 is fully waterproof without additional housing
Action cameras remain the most practical option for rough conditions:
- GoPro Hero series with stabilization is ideal for moving water
- DJI Osmo Action provides excellent stabilization and water resistance
- Insta360 cameras offer unique perspectives with their 360° capture
Smartphone options have become increasingly viable:
- Latest iPhone and Samsung Galaxy models in waterproof cases
- Dedicated waterproof phone housings from brands like Aquatech
Lens considerations: Prime lenses with fewer moving parts tend to resist moisture better than zooms. If using interchangeable lenses, a 24-70mm equivalent range covers most kayaking scenarios.
Essential Accessories
Beyond your camera, these accessories dramatically improve kayaking photography:
Secure attachment systems:
- Peak Design Capture Clip attached to PFD (personal flotation device) for quick access
- Cotton Carrier chest harness systems (must be used with waterproof cover in splashy conditions)
- Tethers for all equipment – nothing should be untethered on the water!
Specialized supports:
- Collapsible paddle float that doubles as a camera support
- Mini tripods that can mount to kayak deck rigging
- Clamps that attach to gunwales or cockpit rims
Cleaning supplies:
- Microfiber cloths in waterproof containers
- Lens cleaning solution in small spray bottle
- Moisture-absorbing silica gel packets
Pre-Launch Preparation
The success of your kayaking photography begins before you even touch the water:
Planning Your Trip
Research your route with photography in mind:
- Scout locations with unique perspectives that can only be seen from the water
- Note the sun’s position throughout your planned paddling time
- Identify potential wildlife areas and scenic highlights
Time your excursion optimally:
- Early morning offers calm waters and golden light
- “Blue hour” (dawn and dusk) provides magical illumination for landscapes
- Midday works well for caves and canyon photography where diffused light is beneficial
Check tides and currents:
- Slack tide often provides the calmest water for steady shooting
- Outgoing tides can reveal interesting shoreline features
- Certain sea caves are only accessible at specific tide levels
Camera Setup
Configure your camera before launching to minimize handling on the water:
Optimal settings for kayak photography:
- Slightly faster shutter speeds than normal (minimum 1/125s for stationary subjects)
- Aperture priority mode (f/8-f/11) for landscape shots provides good depth of field
- Auto ISO with maximum set to 1600 to handle changing light conditions
- Continuous shooting mode to capture action sequences
Accessibility preparations:
- Format memory cards and insert with fresh batteries
- Preset white balance for expected conditions
- Enable image stabilization if available
- Configure custom buttons for quick one-handed operation
Composition aids:
- Enable electronic level indicator
- Set LCD brightness to maximum for outdoor visibility
- Consider attaching a lens hood to reduce glare (secure it well)
On-Water Shooting Techniques
Once you’re paddling, these techniques will help you capture stable, compelling images:
Achieving Stability
The biggest challenge in kayak photography is shooting from an inherently unstable platform:
Bracing techniques:
- “Tripod position”: Wedge your elbows against your torso or kayak
- Use your paddle as a stabilizer by placing it across the cockpit
- Tuck knees against cockpit sides to create a more stable shooting platform
Kayak positioning:
- Position perpendicular to waves to minimize rocking
- “Raft up” with fellow paddlers by holding onto each other’s boats
- Use natural features like rocks or logs to stabilize your kayak temporarily
Camera stabilization:
- Enable in-body stabilization if available
- Consider using a miniature gimbal for video recording
- Shoot in burst mode to increase chances of capturing a sharp image
Creative Perspectives
Kayaks offer unique vantage points – maximize these opportunities:
Water-level shots:
- Position your camera just inches above the water surface
- Create dramatic leading lines using your bow or paddle
- Capture reflections that are only visible from this low angle
Split-level photography:
- Use dome ports for underwater cameras or specialized housings
- Position the horizon line across the middle of the frame
- Focus on the above-water subject (underwater will be slightly soft)
POV techniques:
- Mount action cameras on paddles, bow, or stern
- Use time-lapse during paddling sequences
- Consider chest mounts for immersive perspective
Working with Water and Light
Water creates unique lighting challenges and opportunities:
Managing reflections:
- Polarizing filters reduce glare and enhance underwater visibility
- Position yourself at roughly 90° to the sun for maximum polarization effect
- Remove filters in low light conditions when shooting wildlife
Using natural light:
- Side lighting reveals texture in water and landscapes
- Backlit scenes create dramatic silhouettes and highlight spray
- Overcast days provide even lighting for wildlife photography
Capturing water movement:
- Faster shutter speeds (1/500s+) freeze water droplets and splashes
- Slower shutter speeds (1/15s-1/60s) create silky water effects
- Neutral density filters allow longer exposures in bright conditions

Subjects and Compositions
Kayaking provides access to unique subjects – here’s how to showcase them effectively:
Landscape and Seascape Photography
Framing with natural elements:
- Use overhanging branches, rock formations, or your paddle to frame scenes
- Include your bow for scale and to create a sense of place
- Compose with the rule of thirds, placing horizons on the upper or lower third
Capturing scale:
- Include fellow paddlers to demonstrate the immensity of landscapes
- Look for leading lines that draw the viewer into massive scenes
- Shoot both wide establishing shots and intimate details
Technical considerations:
- Bracket exposures for high-contrast scenes (bright skies, dark water)
- Focus one-third into the scene for maximum depth of field
- Consider HDR techniques for extreme lighting situations
Wildlife Photography
Approach strategies:
- Paddle slowly and quietly, avoiding sudden movements
- Approach at angles rather than directly
- Maintain greater distance than you would on land (use longer lenses)
Kayak advantages:
- Lower profile makes you less threatening to wildlife
- Access to feeding areas unreachable by foot
- Ability to maintain a consistent, non-threatening distance
Camera settings:
- Use continuous autofocus for moving subjects
- Higher shutter speeds (minimum 1/500s for birds, 1/250s for marine mammals)
- Burst mode to capture behavior sequences
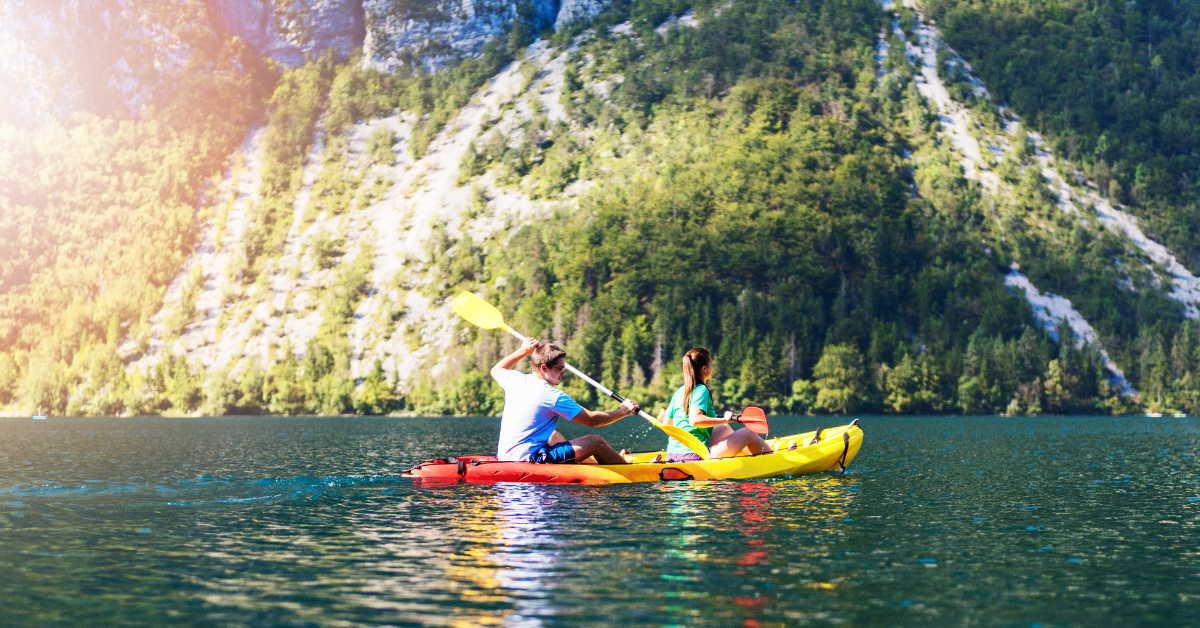
Action and Paddling Shots
Self-portrait techniques:
- Extended selfie sticks or mounts
- Remote triggers or interval shooting
- Voice-activated shooting on compatible cameras
Capturing fellow paddlers:
- Position yourself ahead of the group and shoot back toward them
- Capture the interaction between paddler, boat, and environment
- Look for moments of effort, joy, or contemplation
Dynamic water interactions:
- Focus on splashing paddles and water droplets
- Capture the contrast between calm and turbulent water
- Look for interesting patterns in your wake or in current lines
Post-Processing for Kayaking Photography
The final stage of creating compelling kayaking images happens after you’re back on dry land:
Basic Enhancements
Color and contrast adjustments:
- Enhance blues and greens to bring out water colors
- Increase clarity to enhance water textures
- Use graduated filters to balance bright skies with darker water
Correcting common issues:
- Remove water spots using spot removal tools
- Straighten horizons that tilted during shooting
- Correct color casts from underwater shots
Advanced Techniques
Panoramic stitching:
- Create wide panoramas of coastal scenery
- Use software like Adobe Lightroom or specialized stitching applications
- Shoot with at least 30% overlap between frames
Focus stacking:
- Combine multiple images with different focus points
- Useful for split-level shots to achieve sharpness above and below water
- Requires specialized software like Helicon Focus or Photoshop
Stylistic approaches:
- Consider black and white for dramatic weather conditions
- Try long-exposure effects for flowing water
- Use color grading to create a consistent look across your adventure series
Safety and Ethical Considerations
Great kayak photography never comes at the expense of safety or environmental impact:
Safety First
Always prioritize paddling safety:
- Never sacrifice proper paddling technique for a photo
- Keep one hand on the paddle whenever possible
- Be aware of your surroundings, especially in moving water
Equipment safety:
- Secure all gear with tethers or lanyards
- Have a plan for quick stowing in case of changing conditions
- Practice your camera access system before getting on the water
Environmental Ethics
Responsible wildlife photography:
- Maintain appropriate distance from wildlife (know local regulations)
- Never chase or harass animals for photos
- Avoid disturbing nesting or resting areas
Leave No Trace principles:
- Stay on established water trails where they exist
- Avoid damaging sensitive shoreline vegetation for a photo
- Consider the impact of your group when positioning for shots
Kayak photography combines two rewarding pursuits: the peaceful exploration of waterways and the creative capture of unique perspectives. The challenges are considerable—managing equipment in a wet environment, shooting from an unstable platform, and balancing photography with safe paddling—but the results are worth the effort.
With practice, you’ll develop your own system that balances protection, accessibility, and quality, allowing you to focus less on the technical aspects and more on the breathtaking scenes unfolding around you. Remember that some of the best kayaking photographs convey not just the visual beauty of a place, but the feeling of being there—the serenity of dawn on a misty lake, the excitement of navigating a narrow passage, or the wonder of encountering wildlife at water level.
What makes kayak photography special is precisely what makes it challenging: you’re not just an observer but an active participant in the environment you’re capturing. Embrace this unique perspective, and you’ll create images that truly transport viewers into your aquatic adventures.
Have you captured remarkable photos from your kayaking trips? Share your experiences and additional tips in the comments below!