Top Photo Spots During the Andaman Sea Kayak Tour

Kayaking through the Andaman Sea offers more than just adventure – it gives you access to some of the most photogenic locations in southern Thailand. From hidden caves to dramatic limestone cliffs, every paddle stroke brings you closer to unforgettable photo opportunities.
Here are the top photo spots you shouldn’t miss.
Top Photo Spots During the Andaman Sea Kayak Tour (Detailed Guide)
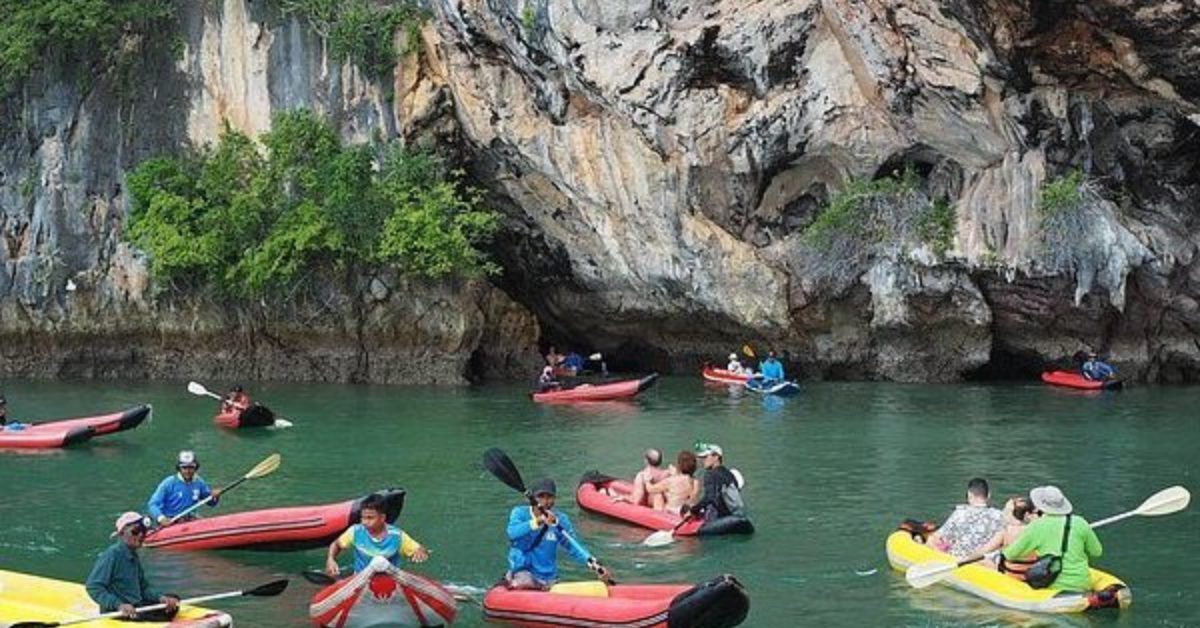
Lod Cave, Koh Panak
Highlights
– A dramatic sea cave that you can kayak through during low tide
– Natural light filters in from the entrance, reflecting off the calm water
– Creates a magical shadow-light contrast
Best Time to Visit
– Low tide: 8:00–10:00 AM or 3:00–5:00 PM
Photo Tips
– Shoot from inside the cave toward the entrance to frame light and dark
– Use HDR or slightly lower EV to balance highlights
Real Experience
– Travelers say it feels like entering a secret world as the light shifts while paddling
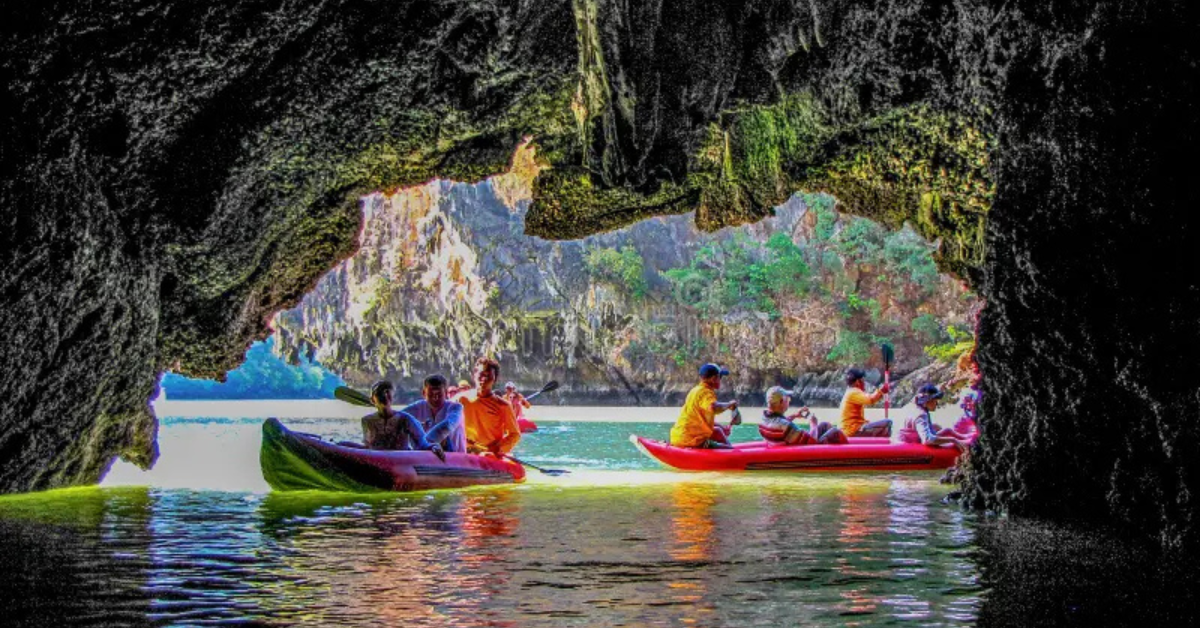
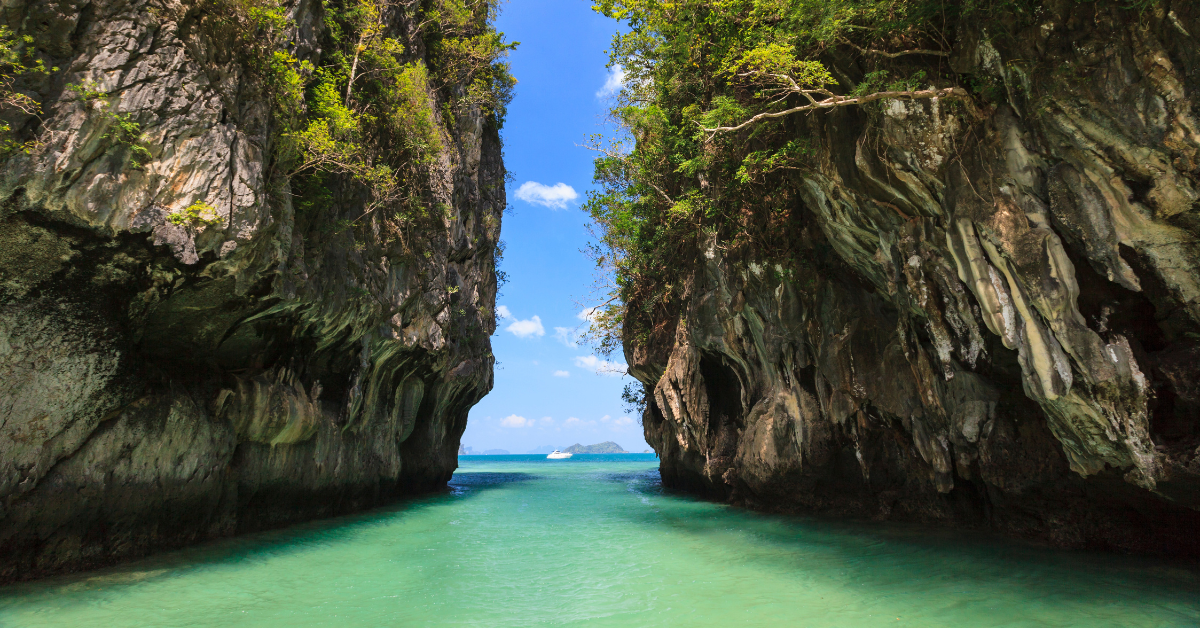
Hidden Lagoon, Koh Panak
Highlights
– A secluded emerald-green lagoon inside the island, accessible only through a narrow cave
– Surrounded by lush vegetation and towering cliffs
– Ideal for wide-angle or centered kayak shots
Best Time to Visit
– Late morning to noon when the sun hits the lagoon directly
Photo Tips
– Use a wide-angle lens and set your camera at the front of the kayak
– Great for slow-motion videos as you enter
Real Experience
– Local guides call this the “Secret Lagoon” because you can only enter when the tide is low
Bat Cave, Koh Panak
Highlights
– A quiet, dark cave filled with large stalactites
– Bats hang from the ceiling in clusters
– Some pools reflect light for added depth
Best Time to Visit
– Daytime for safe paddling and visibility
Photo Tips
– Use a portable LED light
– Settings: ISO 800–1600, f/2.8–f/4, shutter speed 1/10–1/30 sec
Real Experience
– Visitors describe the experience as serene and mysterious with dripping water echoes
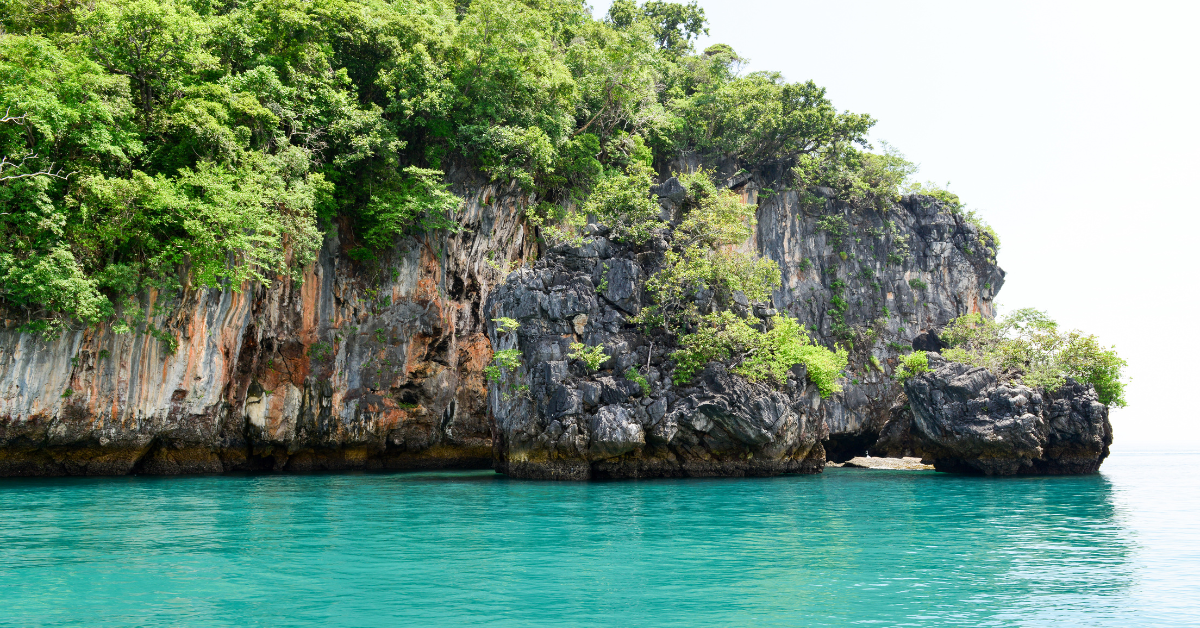
James Bond Island (Koh Tapu)
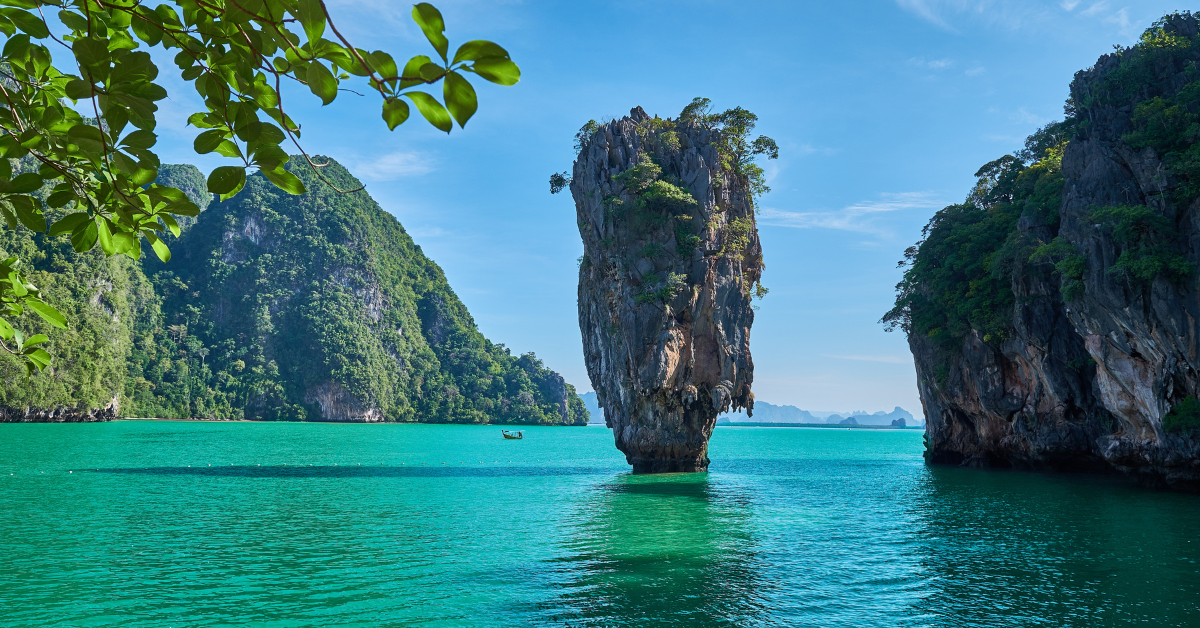
Highlights
– Iconic limestone pinnacle featured in a James Bond film
– Surrounded by deep blue waters and dramatic cliffs
– Best seen from a kayak for unique angles
Best Time to Visit
– Early morning before the tourist boats arrive
Photo Tips
– Frame the island from a low angle using the kayak’s bow
– Add a person in the frame for scale
Real Experience
– Many say the kayak view is more memorable than standing on the crowded island
Koh Panyee Village

Highlights
– A floating Muslim fishing village with wooden houses and a golden mosque
– Offers cultural scenes like fish drying and local kids playing
Best Time to Visit
– Afternoon for golden light on wooden buildings
Photo Tips
– Shoot candid scenes with respect for privacy
– Zoom into storytelling details like hands cooking or boats docking
Real Experience
– Visitors often call this the “cultural gem” of the trip
Diamond Cave, Hong Island
Highlights
– Stalactites sparkle under light, resembling diamonds
– Quiet, cool, and echo-filled interior
– Light beams can enter from above depending on tide and time
Best Time to Visit
– Midday for natural light through cave openings
Photo Tips
– Use high ISO and a manual mode to lock exposure
– Macro mode works well for crystal-like textures
Real Experience
– Described by some as “like stepping inside a giant gemstone”
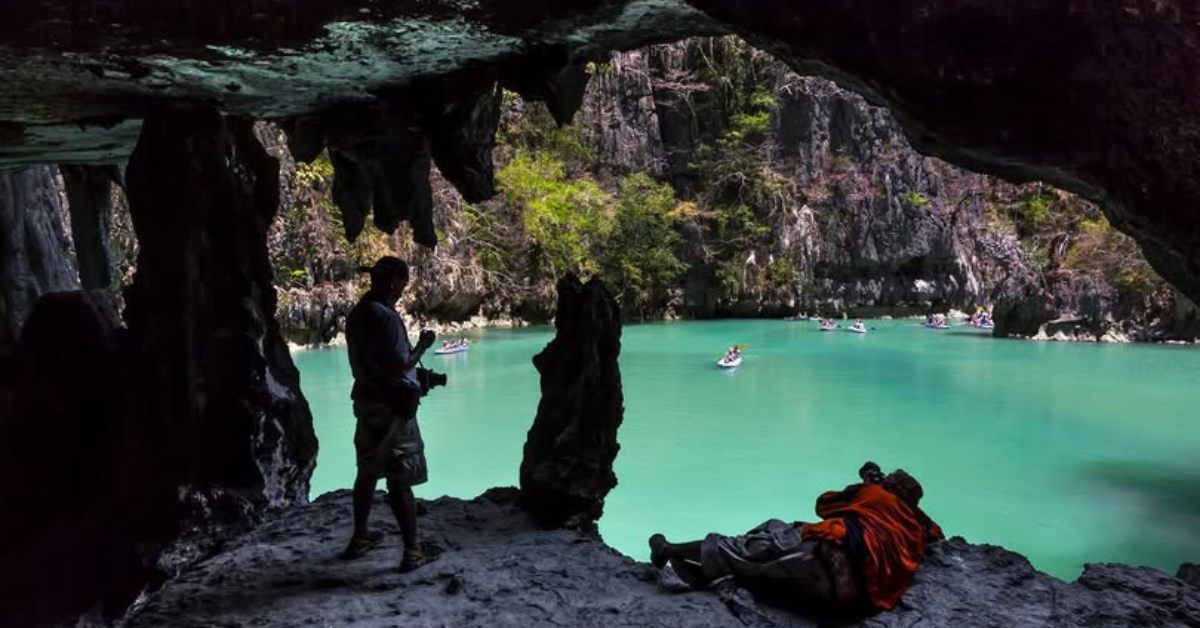
Hong Island Lagoon
Highlights
– A near-perfect circular lagoon surrounded by cliffs
– Calm, green water ideal for wide panoramic shots
Best Time to Visit
– Late morning to afternoon for best light reflections
Photo Tips
– Use panorama mode or wide-angle lenses
– Drone or GoPro can capture 180-degree views (where permitted)
Real Experience
– Landscape photographers call it “The Mirror of the Andaman Sea”
Hong Island Beach
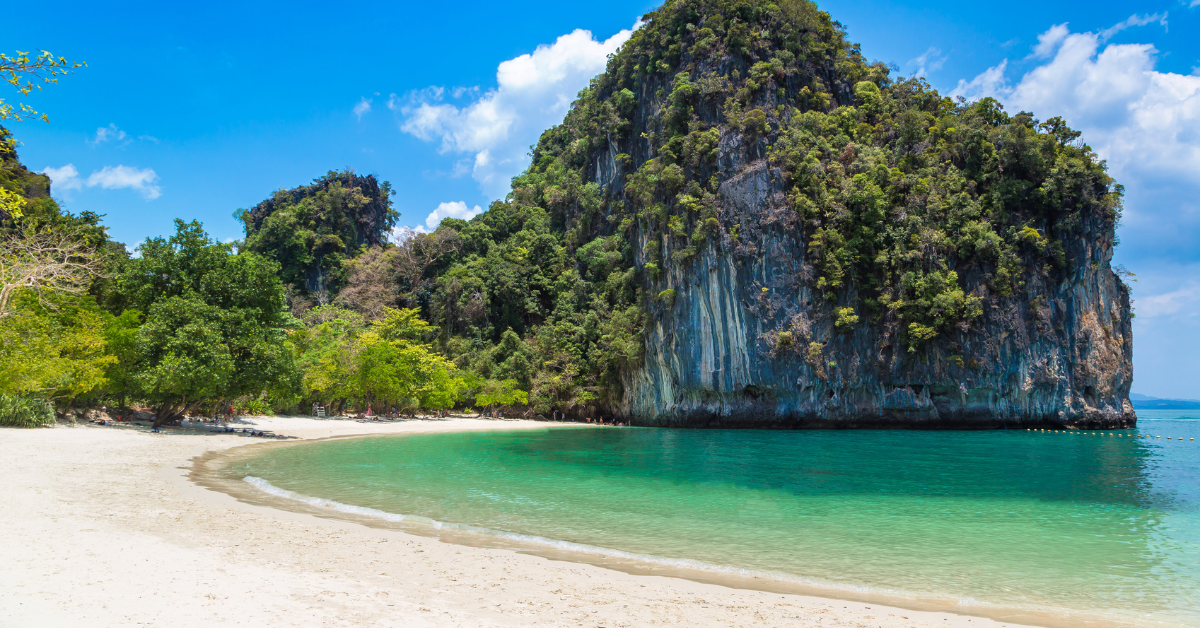
Highlights
– White sandy beach with clear turquoise water
– Often dotted with longtail boats in the background
Best Time to Visit
– Morning (less crowd, softer light)
Photo Tips
– Frame using the Rule of Thirds
– Capture soft backlight and long shadows for a peaceful tone
Real Experience
– A popular spot for profile photos and social media covers
Planning for the Perfect Kayak Photo Session
-
Study the route
Know where the photo-worthy stops are to plan your timing -
Pack essential gear
-
A camera that shoots RAW
-
Mini tripod with ball head
-
CPL/ND filters
-
Waterproof power bank
-
-
Check the light schedule
Use apps like Golden Hour or Sun Surveyor to know ideal shoot times -
Practice kayaking
Smooth handling reduces shake and helps with better compositions -
Respect nature and locals
Don’t get too close to wildlife or locals without permission -
Have a backup plan
Cloudy? Use monochrome or high-contrast styles for mood shots